
Welcome back, dear readers. Today I’m going to be breaking with my recent habit of introspective posts and get into a potential tool for you guys. I started using a ‘Project Binder’ for myself to keep track of the progress on multiple projects. This way, I could know at a glance if I was waiting on someone else to get back to me, if I was waiting on items in shipping, or what step of a project I was on. This differs from my Scanner Journal in that it does not really include inspiration images, materials or items sourcing, or working out sketches. This is basically a binder full of trackers for all of those projects going on.
Plus, it’s fun to just decorate something mindlessly at times, and to have a little personal gloat session when you flip back on all of the projects you have finished. I know I’m particularly guilty of not taking any time to preen or take satisfaction in stuff I’ve done. Usually I’m immediately off on another project that I could be DOING.
How Do I Structure a Project Binder?
Keep in mind, this is just my personal structure. There is no Astral Project Binder Police that are going to clutch their pearls and say you are DOIN IT WRONG. I don’t even consider myself the ‘creator’ of this system, because I am positive I saw something similar somewhere and simply modified it.
I use a six-ring binder meant for half-page size paper. I believe this is called A5 size. But, it could be off by a few millimeters. I also use plastic page protectors to protect the papers themselves from me, my drinks, my snacks, cats, etc. This way, I can also move pages around. If I wanted to, I could sort everything into sections further than I do already.
At the moment, I separate actual projects like drawing for my shop, freelancing assignments, and art collaborations from my solo-play trackers and magic related trackers. As a geekomancer / pop-culture magician, I believe that solo-play games have a very interesting potential as astral /spiritual work. But, those are posts for another day.
As related to magic, I also needed an easy reference for my Clow Sorcery. So all of the magic is kept in its own little section. I just need to find wherever I stored the A5 plastic separators so I can make a fun little section page for them.


How is Each Page Set Up?
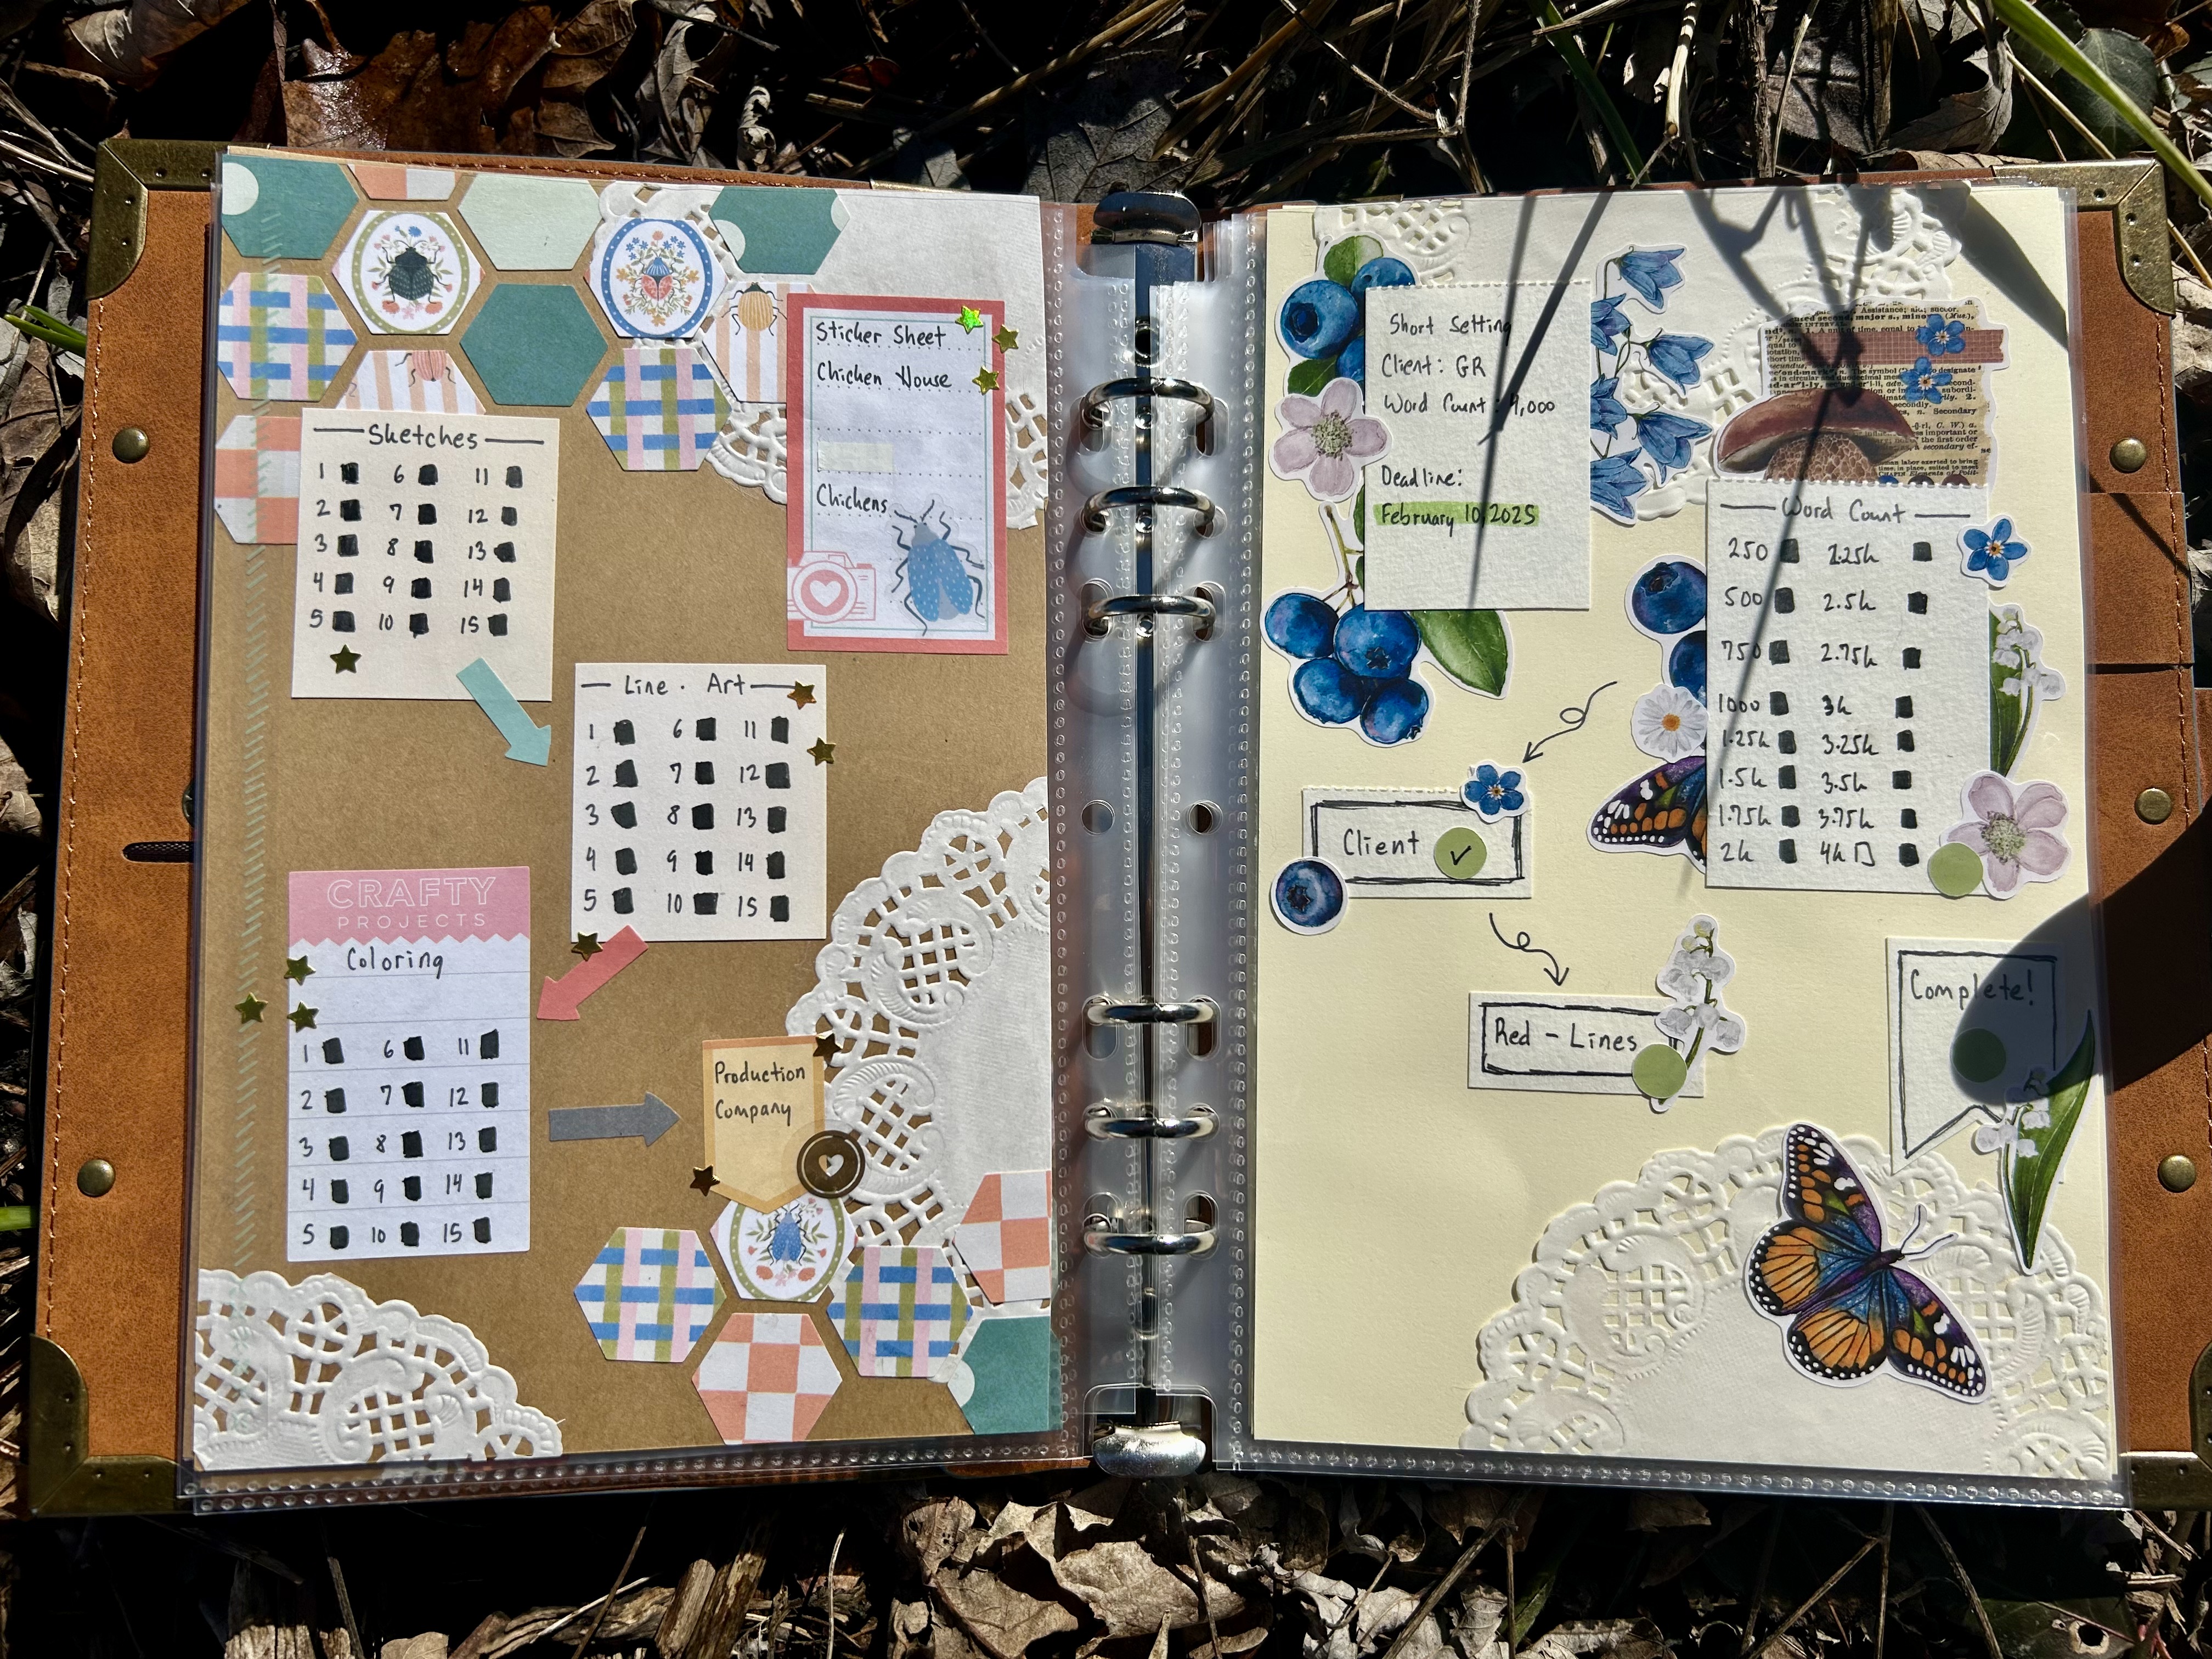
The first layer of each page is a background decoration. I have a few ‘blank’ pages that are decorated and ready to go in the back. Right now, I’m having a lot of fun with these hexagon shapes and playing with color, texture, and pattern within those shapes to do this varies honeycomb look. For me, it’s a fun little thing that I don’t have to think a ton about—plus the result is cute.
On top, I write a ‘brief’ of the project. What is the project’s name or a way I think of it? Is it for me personally, my business, or a client? Does it have a deadline? These are all the most important details.
Next, I have individual boxes that I use to break up big chunks of the project process. Within each box, there are smaller hunks of that same process. So, for my freelance assignments, I write the company I work for and the deadline. Then, I make a big box for my first draft—with word count increments inside. I try (and do not always succeed) at breaking up the word count chunks into pieces that feel both substantial and allow me to regularly check them off, so I can see progress being made. After that, there is a small box for ‘Send to Client.’ Once this box is checked, I know my editor has my initial draft. It’s a nice quick way of seeing “Oh, I am waiting on my editor! I don’t need to worry about this project until I get notification about my redlines!”
Then, I have a box for ‘Redlines.’ This is what we call the revisions and comments you receive from your editor. Once that box is checked, I know I have my redlines and I can be working on correcting and editing them. Once my corrections are finished, I send them back to the editor.
Note, this process can cycle 2 or (in the extreme) 3 times. If that happened, I would add an additional sticker with (2) or (3) on it to indicate the cycle. Once the edits are within acceptable perimeters, then the project is complete, and I can put a big finished check mark on the project!
The overall goal of this system was to give myself a very easy way to check all of my project statuses at a glance. Also, I thought it would be nice to shop my stash a little and maybe use up some of my supply pile. By using some of my favorite stickers on title pages or separators, I also felt like I could happily see them long term. It did help get some of my favorites I had been hemming and hawing over into use!
I can see how this might be helpful for some, but I can also see how people might get stuck on perfectionism with the decorations. Ultimately, it’s one potential tool that can be changed to suit each individual.
So what do you guys think? Which project was your favorite spread?
Leave a Reply